

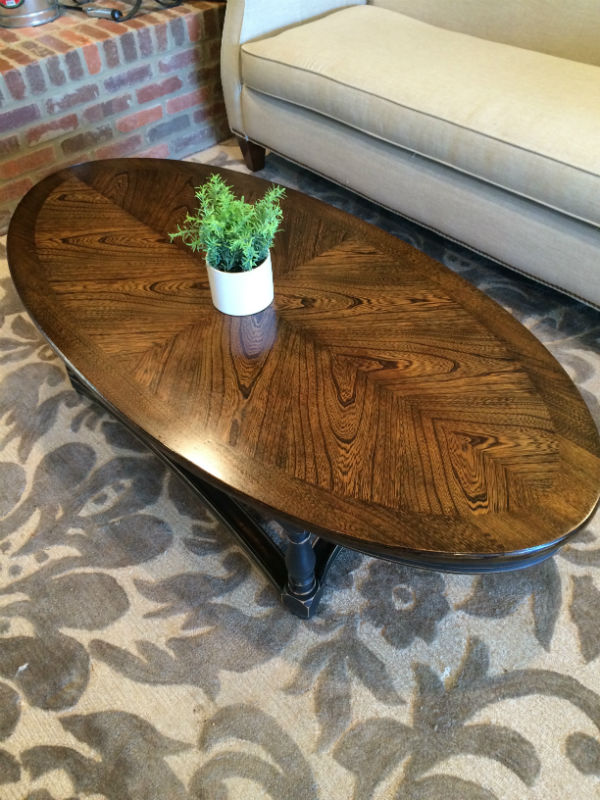
In my most recent post I shared with you my struggles with the coffee table I was trying to refinish for my friend. I finally figured out the sanding and got the stain to go on beautifully. (Click here if you missed that post and want to read it.) Then I was ready to apply the top coat over the stain finish. Polyurethane made the most sense for this table since the stain was oil based and it needed an oil based top coat (never mix oil based finishes and top coats with water based).
After all the struggles with the beginning of this refinishing process, surely this final step will be a breeze, right? Wrong. Boy did I learn a lot from this beautiful table. Here are 7 tips I’d like to share from my experience applying polyurethane top coat over my oil based Minwax stain finish.
- Be sure your finish is completely dried before applying your top coat. I let the stain on the table dry according to the instructions on the can. However, when I began to apply the polyurethane the stain was picked up by the top coat and made the finish look streaky. I tried to wipe the streaks out, but in the end I decided it would be best to start completely over. Again. From the beginning. For the third time with this project. My advice is to let the finish dry as long as you possibly can before applying your top coat. Patience is definitely a virtue here. Give it at least 24 hours, longer if you can.
- Invest in a quality, thick, natural bristle brush. I started with a foam brush because I had one handy and it says on the can that the polyurethane can be applied with a foam brush. However, I discovered that a quality natural bristle brush gives a much smoother finish. They are not cheap, but the price is worth the hassle it will save you. I used one similar to this one:

- Soak your brush in mineral spirits for about 10 minutes prior to beginning your application, pressing the brush into the mineral spirits to get rid of any air in the bristles of the brush. I found and watched this video when I discovered I had tons of bubbles in my top coat and I was trying to figure out how to apply the polyurethane with no bubbles. It will show you the steps you can take to rid your brush of any air that might cause bubbles in your finish. Trust me, it’s worth the extra time to go through the steps he suggests.
- Thin your polyurethane with mineral spirits. The mineral spirits will provide a more forgiving coat of polyurethane and will also help any bubbles in the finish to burst before it sets up and dries. Pour the polyurethane into a separate container and add some mineral spirits. A good formula is three parts polyurethane to one part mineral spirits. Stir the mixture very SLOWLY. You don’t ever want to shake or stir the polyurethane vigorously as this can create air and more bubbles, which is what you’re trying to avoid.
- Apply a thin coat of mineral spirits to the surface of your project prior to applying the first coat of polyurethane. This will help the polyurethane go on a little bit easier.
- Slow and steady wins the race. This is not a process you can rush. Rushing and skipping steps will only get you an ugly bubbly finish. When you load up your brush with polyurethane and lay it on the surface of your project, drag it very slowly. This will minimize the bubbles in your finish.
- Don’t overwork the polyurethane once you have applied it to your surface. The more you brush it to try and smooth out bubbles or brush marks, the more bubbles you will create. Brush it on very slowly, and give it one final pass with feather-like pressure of your brush in one direction and then leave it alone.

Here is the final product after all my trials and errors. So thankful it turned out so great in the end and glad I can help you learn from my mistakes!


Want my guide to choosing your Wise Owl Paint products? Sign up here and get it delivered to your inbox!
I respect your privacy and will not sell your email address to 3rd parties. You will only receive emails from me about my furniture painting adventures. 🙂
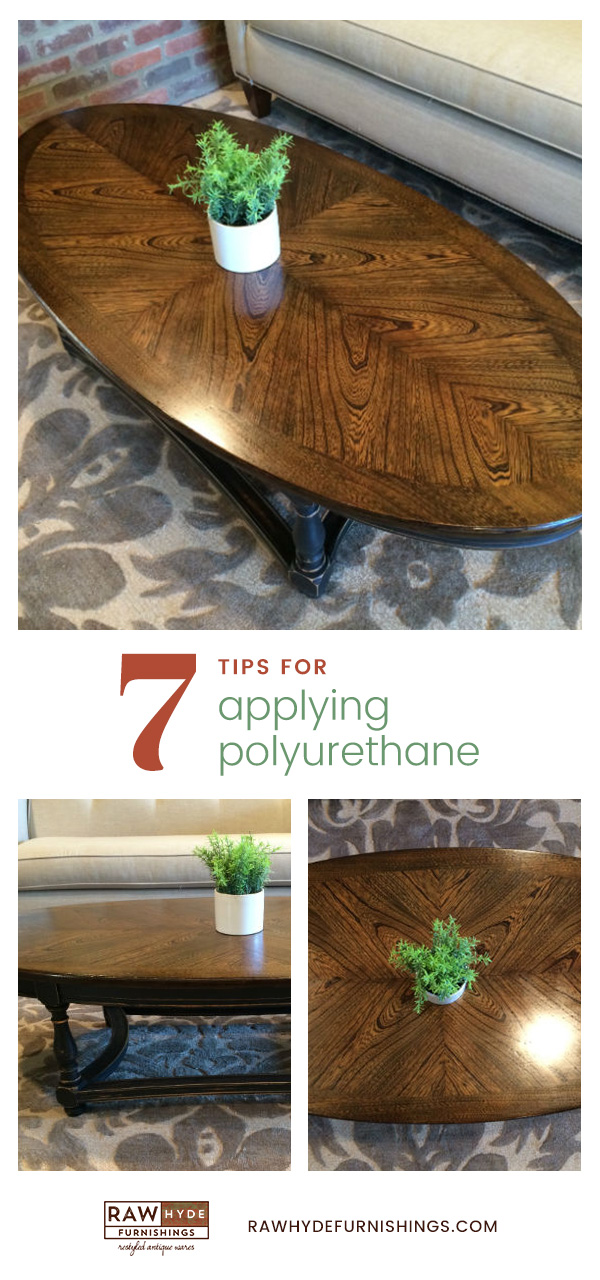
Pin this to save it for later!
April, this is beautiful! Thank you for the tips you shared. I have recently had diffulties with bubbles in polyurethane and this advice will surely help, next time around. Love seeing all of the featured pieces and reading your blog.
Hi Marta! So glad you think this might help you. I am happy to share tips I learn from my blunders. 🙂 Thanks for stopping by the blog!
I am finishing a similar table with different wood grain directions. How did you apply the poly? Did you paint it on in sections with the wood grain, or just on one direction for the whole table? I did my poly in sections and the edges of the sections are now apparent. Thanks!
Hi Lori, I believe I applied the poly all in one direction across the entire surface of the table. Make sure you have wiped away any remaining stain on the surface and that you have given the stain ample time to dry before you do this or it can drag the stain across the sections in streaks. Good luck with your table!
I also have a table with multiple wood grain directions. Do I understand that when I apply the poly I go in one direction only (not individual grains as I did when I initially sanded). Then when I sand after applying the poly, you sand in one direction?
Hi Joan, yes, you can apply the poly all in one direction. Just make sure the stain is super dry before you apply your first coat of poly or it can streak the stain across the different grains. When you sand between poly coats be sure to very lightly sand. Good luck with your table!
Cant use use the mineral spirits & poly mix to remove bubbles? I have several small patches of pimples!
Hi Mary Ellen, I found that if I had bubbles in my finish when it was completely dry, the only way to truly get rid of them was to sand out the bubbles and reapply following all the steps listed above. The bubbles should burst on their own in the process of drying, but it is a very finicky process unfortunately. One that obviously took me multiple tries to get right my first time. Good luck with your project!
I make wooden sided trays and have moved up from using reclaimed barn wood making them to more expensive red oak, poplar and other hard woods. This has been an ongoing learning curve as the reclaimed wood is more forgiving. My issue seems to be when I am applying the polyurethane and it dries I am noticing area that look like pooled areas on the wood. Not sure what I am doing wrong to cause this. They just appear to be areas where more poly has collected than on other parts of the board. Will thinning the poly help with this.
Hi Bill, so sorry I’m just now seeing your comment. It can be tough to get that even coat we all want. Thinning the poly may help it to self level a bit easier. I typically take my brush and give one final pass through each section as I go to try and minimize and pooling and spread out the product as best as I can. Still there may be some pooling, but they should dry fine like the rest of the finish. It just may take those areas longer than the thinner spots. Hope that helps.
How do you feel about water based stain and polyurethane for a dining table? Workin indoors and I am Bergius about oil based products. Thank you!
Hi Mary Lee, I totally understand not wanting to use oil-based products indoors. I can’t speak to all water-based products, but I do know that the Wise Owl glazes make beautiful stain as well. There are a few retailers who have done videos using the glazes in this way. Polyurethane is also an oil-based product so if you are using a water-based stain or Wise Owl glaze I would recommend using a water-based topcoat as well. Water-based topcoats don’t have the same longevity as oil-based topcoats. However, I would personally feel very confident using 3 coats of Wise Owl varnish to seal a dining table for adequate protection. I suggest using one or two coats in the satin sheen first, and following with the matte sheen if you prefer a matte sheen. The more shiny the sheen, the stronger the protection for longer. You can find the Wise Owl glaze here: https://rawhydefurnishings.com/store/wise-owl-glaze-pint/. And you can find the varnish (water-based topcoat) here: https://rawhydefurnishings.com/store/wise-owl-varnish/. Let me know if I can help you further.