

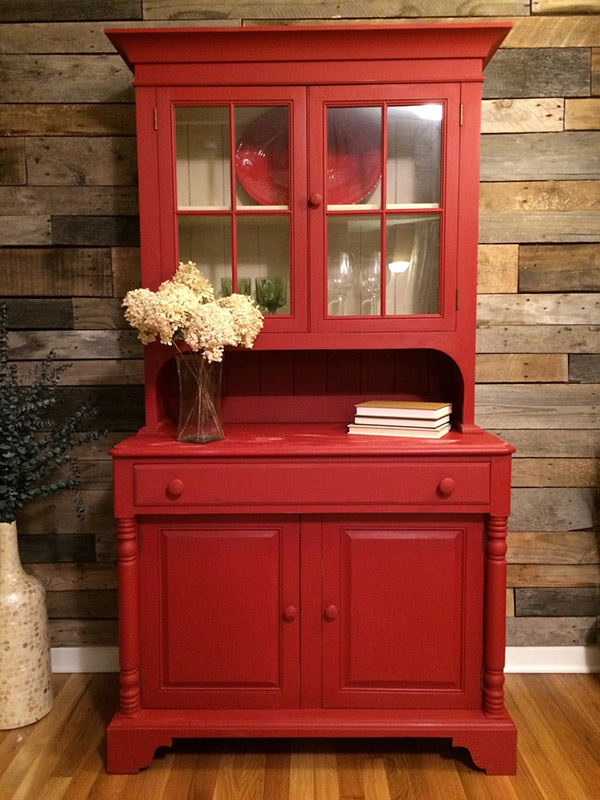
One of my favorite things to do is try to capture a great photo of my pieces when they are finished. It is so rewarding to set them up and see how they might look in someone’s home, and take a moment to admire the finished work. For a long time I used various areas of my home which meant I was moving the existing furniture in our home out of the way to replace it with the finished pieces, taking the photo, and then moving our furniture back (or not – the painted pieces just start to feel like they belong!). If that sounds like a lot of work, I can assure you it is. So I decided to create a rustic backdrop for my RAWHyde Furnishings photos, and a pallet wood wall seemed perfect. I don’t really fancy myself a builder of anything, so trust me when I say you can do this! And for any tools I mention that you are unfamiliar with, check out the links I’ve provided at the bottom of this post where you can find the tools I used for my wall.
Step 1: Find your wood pallets. Some people sell these on Craigslist, but you can find free ones if you know where to look. Check with retail stores, grocery stores, hardware stores, etc. I found mine at a landscaping company. You will read in many other blogs and DIY posts that you should be careful about what materials were transported on the pallets. If you are doing this in a baby’s nursery or similar location, definitely be more careful about that. Since mine is just a photo backdrop in my paint studio I wasn’t concerned about it.
It’s tough to say how many pallets you will need. My wall is approximately 6’x8’ and I used about seven pallets.
Step 2: Disassemble the pallets.
Tip: It can be a lot of work to tear the pallets apart in order to use them. If you want to take most of the hard work out of it, use a sawzall and cut the nails between the wood. You can disassemble a pallet in a matter of just a few minutes this way. There are many videos on YouTube you can watch to get more of a how-to on this. This one was really helpful to me: https://www.youtube.com/watch?v=ZbLpwGhCOJU.
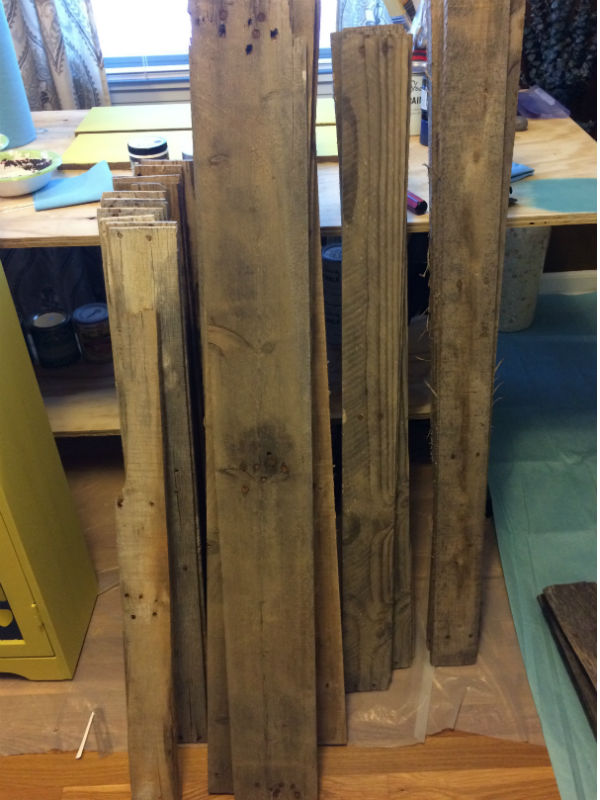
Step 3: Give your disassembled boards a light sanding with 220 grit sandpaper to knock off any dust or loose particles. Use fairly light pressure and be careful not to sand away the character of the wood. You don’t want the wood to be smooth, just give the surface a gentle cleaning with the sander.
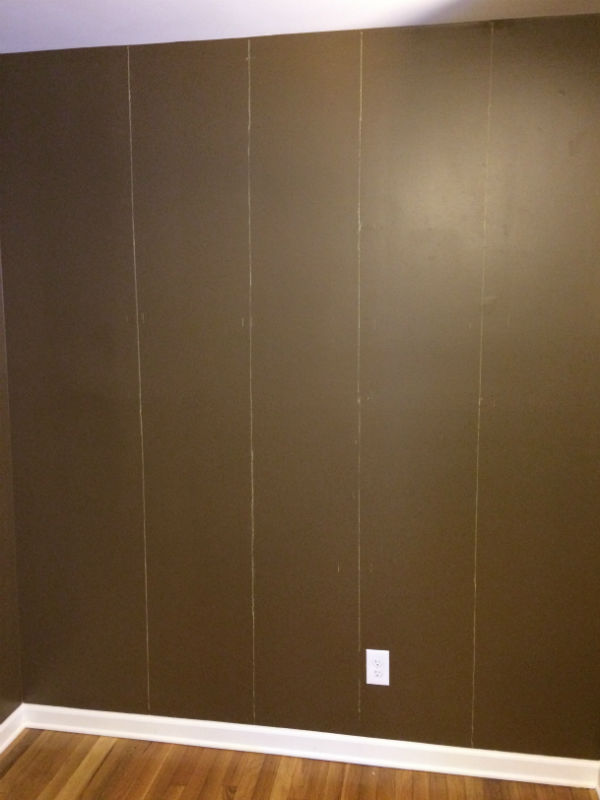
Step 4: Prepare your wall. First, you’ll want to paint the wall a dark color. The wood you are using will not line up perfectly and you will have some gaps between boards. The dark paint behind them helps to hide the gaps so they aren’t noticeable. My wall happened to already be painted a dark brown so I just left it as it was. Next, find the studs in the wall on which you plan to install the pallet wood. I used a cheap stud finder (see tool links at the bottom of this post). It was a little cantankerous, but worked fine for the price. I marked the edge of the studs with chalk from the top of the wall all the way to the bottom. This makes it easy to see them as you work.
You’ll need to think about how you want to attach the pallet wood to your wall. Since I don’t plan to hang anything on the pieces of wood, we simply used finishing nails with bright finish. However, if you intend to hang pictures, mirrors or shelving on your pallet wood wall you may want to consider using wall anchors and screws in the seams that don’t line up with a stud. I hammered a nail into each board in every spot where it lined up with a stud. For the ends that were not on a stud, some of them I just left as they were – no nail. Again, I don’t plan to hang anything on this wall so I wasn’t concerned about the ends of some boards not being secured. Each board was long enough that it was secured on at least two studs, most of them are secured to at least three studs. They aren’t going anywhere anytime soon.
Step 5: Organize your boards by width. This makes it easy to choose boards as you go.
Tip: I drew out a map on a piece of paper just to figure out how many rows I wanted of thick boards versus thin boards. I did not plan out the entire wall in terms of which shade of wood to place where in advance, only the widths.
Step 6: Start in the center of the wall and work from top to bottom, staggering the boards to your liking.
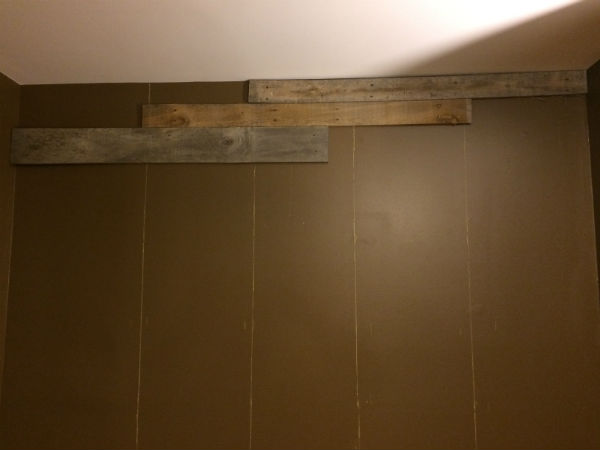
I suggest starting at the top because you know the top of the wall will always be more visible than the bottom. If you end up with some tricky measurements and cuts near the bottom, they won’t be as visible if you happen to botch them or if you run out of your favorite shade of wood. (Note: You can choose to stain or paint your boards to the shades and colors of your liking to make sure you have enough of your favorites. I chose to leave the boards natural.)
The reason I started in the center is because I felt like I could get a more random looking staggering of the boards. I read a few blogs that suggested doing it this way, and I felt like it worked well without putting a ton of thought into it as I went along.
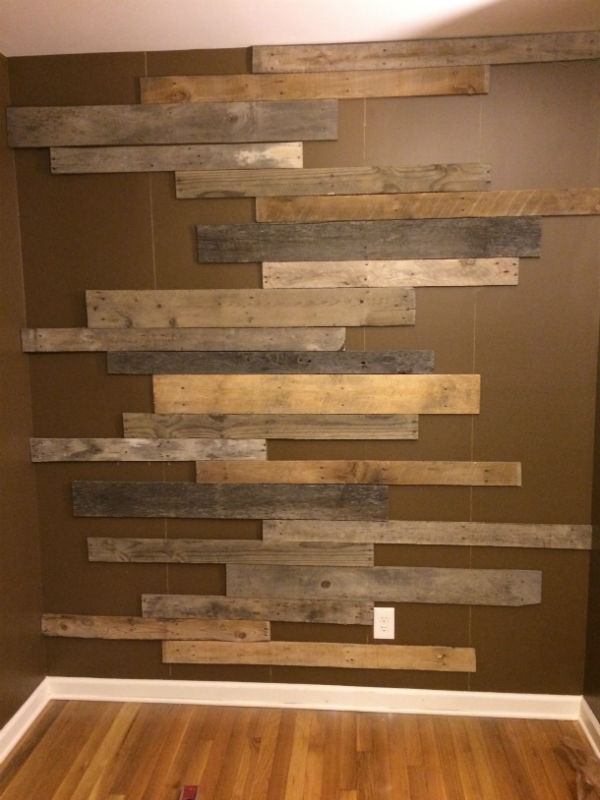
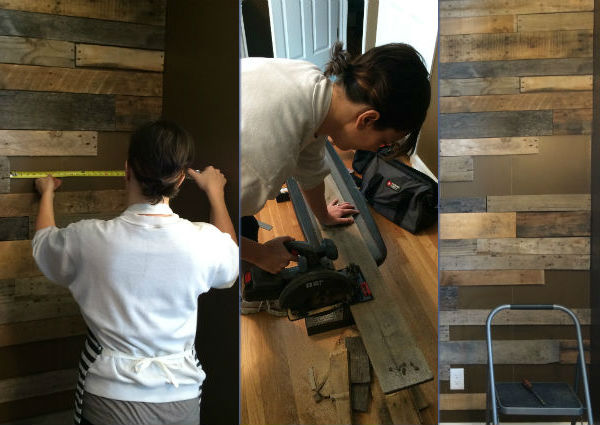
You’ll want to check each board to be sure it is level. This is especially important for the boards down the center, and can be a little tricky since you are working with pallet wood and the edges will most likely not be straight. A long leveling tool is best. Mine was 2’ long, but if you have or can get a longer one, great.

Step 7: Once you have staggered boards from top to bottom down the center, you can start filling in the jigsaw puzzle by measuring and cutting the boards with a circular saw. If you’re not accustomed to using a saw, I suggest using a sample board and trying a few practice measurements and cuts to get the hang of it. It is not difficult, you just want to get a feel for how to line up the blade with your measurements.
You can see we have one outlet on our wall. I was honestly scared about getting to that point, but it turned out to not be that difficult. I put one full length board up against the left edge of the outlet just so that I would have one less odd cut to make (I’m all about making things easier when possible!). Also, some blogs I read mentioned extending the outlet out from the wall so that you don’t have a sunken outlet. I personally didn’t feel it was a big deal so I just left the outlet as it was and cut the boards around it. The outlet still functions the same and I don’t think it looks bad.
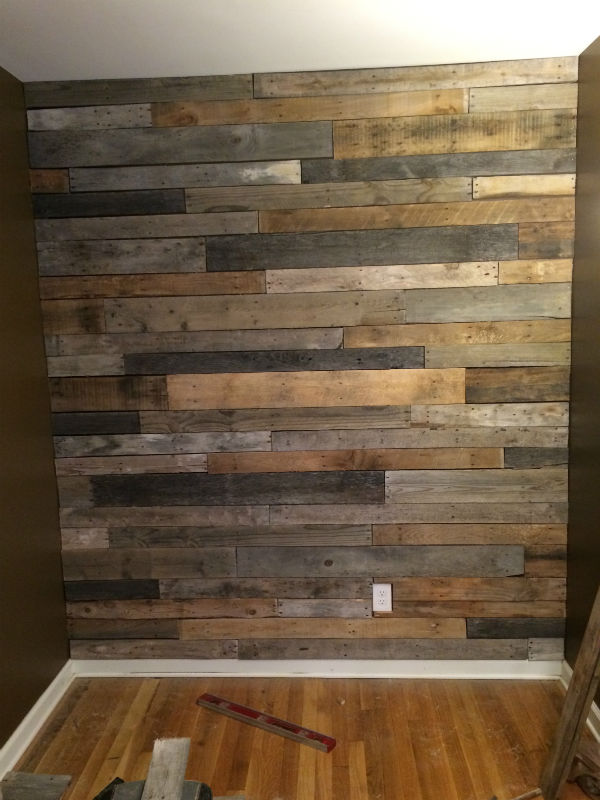
Don’t feel overwhelmed, just take it one board at a time and before you know it you’ll be enjoying your masterpiece! I would love to hear from you if you try it, or have already built a pallet wood feature wall. What were your successes/failures? What other tips do you have for folks trying it for the first time? I also welcome any questions from those of you about to take the plunge. Happy building!
Here are the tools I mentioned using for your convenience.


That is beautiful!!!! I’m going to try it. I have your cell on standby!!
Love this post! I can’t wait to do this in my office! Thank you for writing.
You are impressing me each time. The biggest part of learning a skill is doing. Not only are you ‘doing’ you are ‘doing’ it well. Great look and information!
awesome! thanks for sharing this…now I can show my hubby what I want!
I am starting this tomorrow. I have all my wood prepared and the wall is ready. Starting to hang tomorrow.
Just seeing this! Hope your project went well!