I told her I was happy to help with the table, but gave full disclosure that this would be my first sanding and staining project. After all, I’m the girl who LOVES chalk paint BECAUSE there is NO SANDING. She still put her trust and her sentimental table in my hands.
I researched and googled the process and learned the basics of sanding and staining. It’s a fairly straightforward process. Here’s where it gets tricky, this particular table has a quarter sawn top and the wood grain is going in four different directions, five if you count the band around the edge.
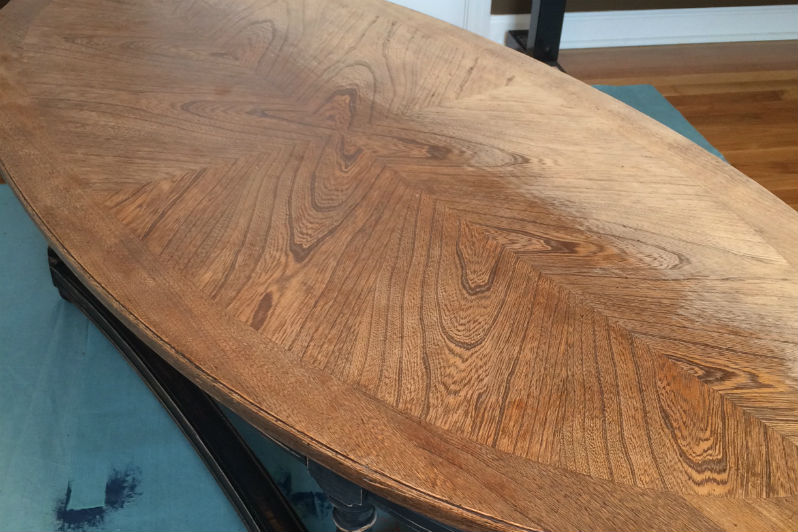
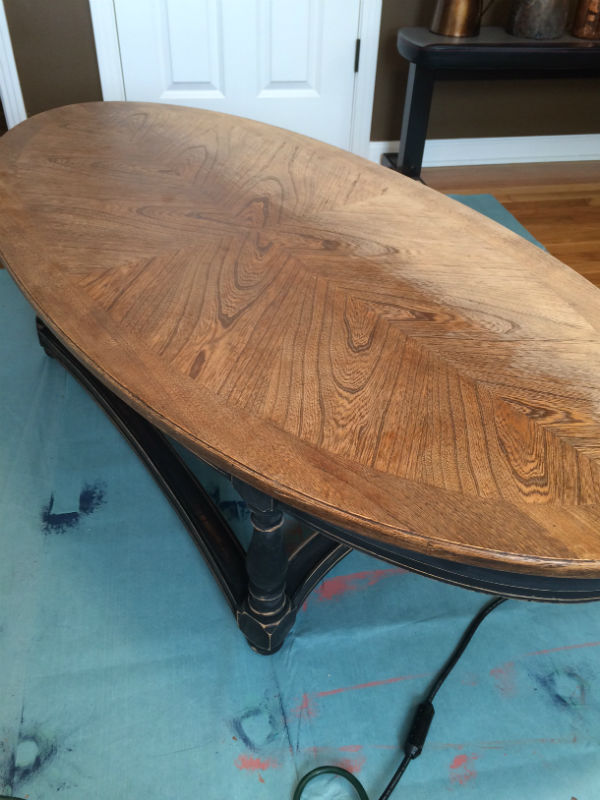
The basic rule of sanding is you always sand with the direction of the wood grain, never against it. So I started at one end of the table with my power sander, in the direction of the wood grain of the band around the edge of the table. Here’s a photo midway through the sanding process.
If you’re a sanding expert, you see my mistake right away. Yep, I sanded from one end of the table to the other all in the same direction. That means the sander was going across those beautiful quarter sawn pieces in the middle AGAINST the wood grain. It didn’t occur to me right away. Not until I applied the first, and then a second coat of stain did I start thinking something might be wrong. It had a very streaky appearance that I couldn’t get to go away.
Then it dawned on me – oh no! I SANDED the entire table mostly AGAINST the grain. I also applied the stain in the same manner. That is why I can’t get these streaks to disappear. Enter panic mode. This very sentimental table belonging to my friend was, in my eyes at that moment, RUINED. I had to find a way to fix it. My conscience was so heavy thinking I had ruined this table and I was dreading having to break the news, or more likely, hoping she wouldn’t notice when she saw it. There HAD to be a way to fix it because neither of those options hit me as appealing at all.
So I went back and researched more, this time googling how to fix my rookie mistake. I finally found a post from a woman who had the same problem. Her son had sanded her dining table she wanted to refinish against the grain. Some kind gentleman explained she just needed to go back over the table with the same grit sandpaper her son had used in the direction of the wood grain. Then go over it again with a finer grit. Also, somewhere along the way in my research I read that a random orbit sander would be best for this job. Originally, I used my square palm sander.
Off I went to Home Depot to purchase the needed supplies: a random orbit sander, sanding discs in 100 grit, 150 grit, and 220 grit (the higher the number, the finer the grit). Here are the steps I took to fix the table:
- Using the 100 grit sanding discs (I originally sanded the entire table with this grit), I carefully and methodically began sanding off the two coats of stain I had applied, one section of wood grain at a time. I started with the quarter sawn pieces in the middle, sanding in the direction of the wood grain of each of the four individual sections. Then I sanded the band of wood around the outer edge of the table. It took multiple sanding discs to remove the freshly applied stain because they kept getting gummed up with stain. But I was determined to get past the stain to the wood to reverse the effects of my initial sanding and hopefully remove the scratches.
- When I felt like I had done all I could do with the 100 grit (most of the visible streaks were gone), I then went over the entire table in the same manner with the 150 grit. And repeated the same process with the 220 grit.
- And last I applied the stain, this time applying it in the same manner I used to sand the table this time around – one section at a time in the direction of each section’s wood grain.
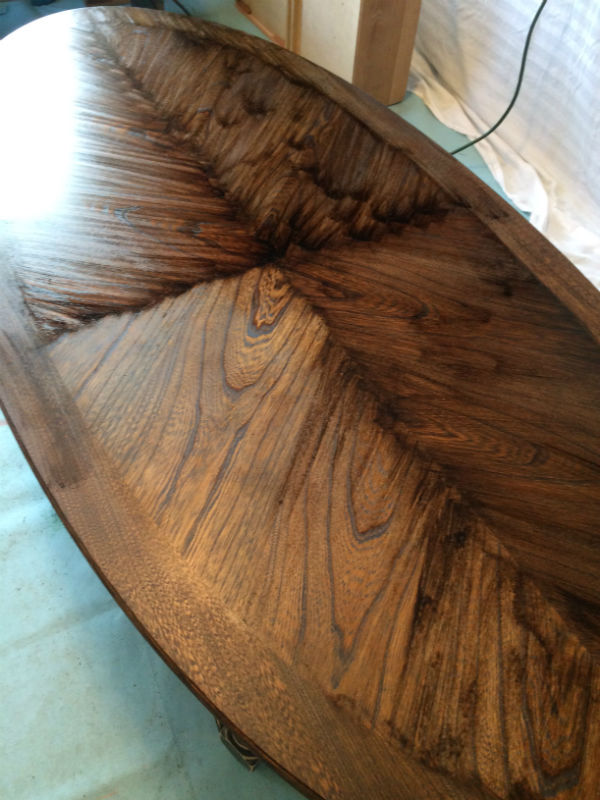
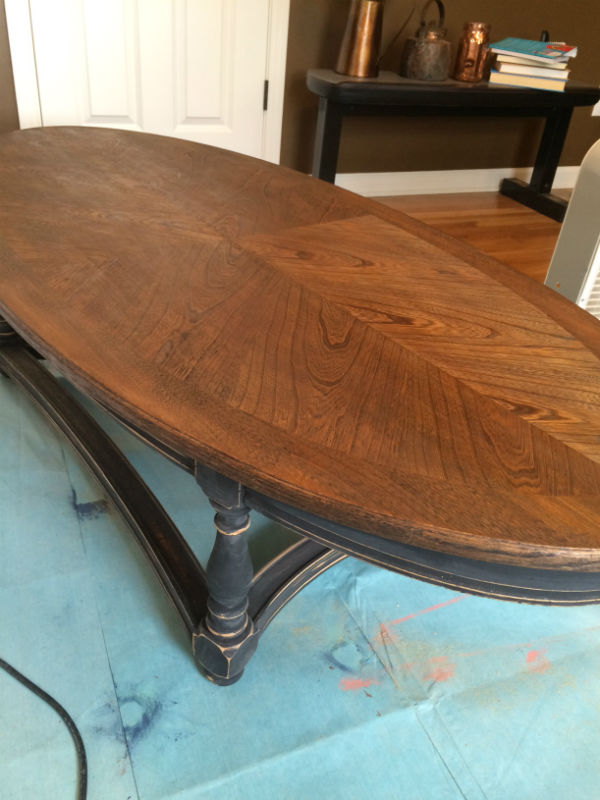
And the results were weight lifting! Just look at the difference! No more streaks!
BEFORE
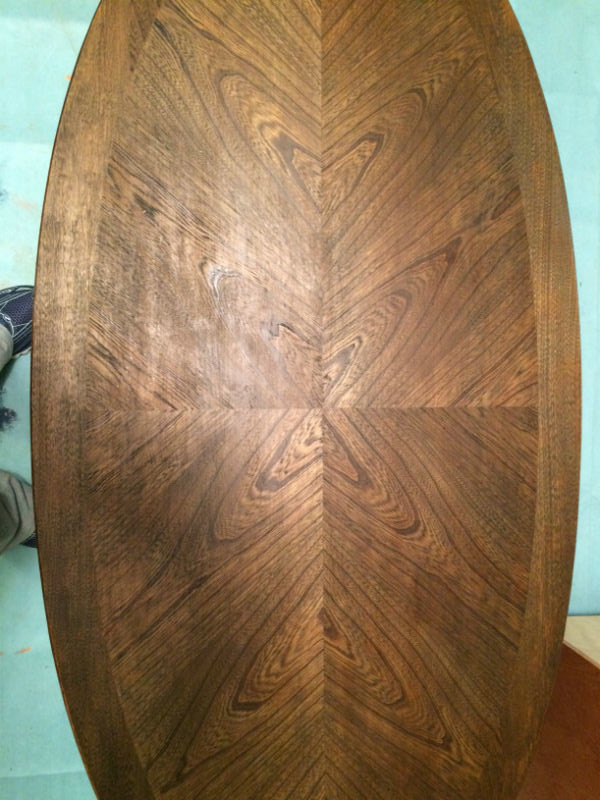
AFTER
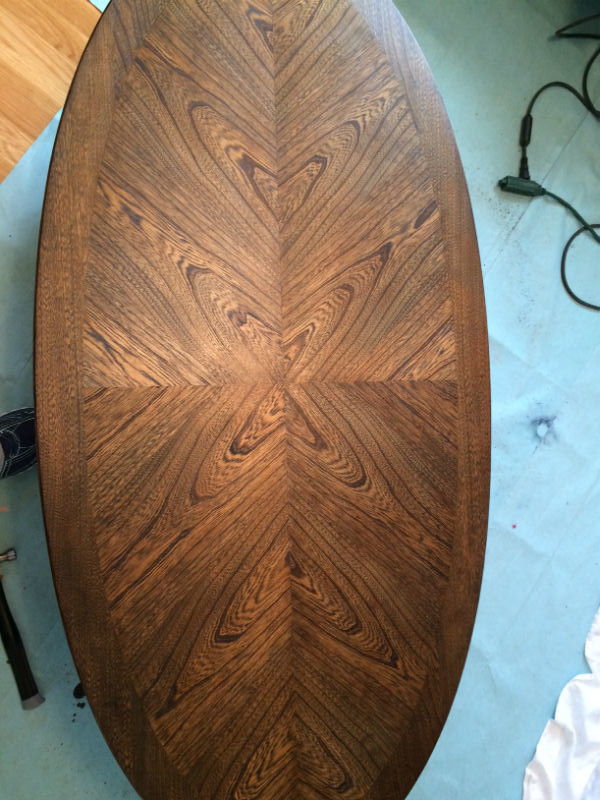
This is before the topcoat. I’m saving that experience for a blog post of its own.
UPDATE: You can read the blog post with my tips for applying the topcoat here.
So happy I was able to renew this beautiful table for a friend, albeit not without a major hiccup! Lessons learned the hard way are often the best remembered lessons.
Want my guide to choosing your Wise Owl Paint products? Sign up here and get it delivered to your inbox!
I respect your privacy and will not sell your email address to 3rd parties. You will only receive emails from me about my furniture painting adventures. 🙂

Its beautiful!! Wow, you worked really hard to make it a great piece. I know your friend will be thrilled 🙂
Omg! I would have freaked out to the point of no return! It looks great now! Happy you fixed it!
Me too!
You did an amazing job!!! I don’t think it ever looked that good! 🙂 I love it!
I’m so glad you love it, Laurie! That means a lot coming from another member of the family who enjoyed this table growing up. 🙂
Fantastic forum topic.Much thanks again. Cool. Riggs
Thank you! Appreciate the feedback very much!
I just purchased a beautiful coffee table for my daughter and her husband from Craig’s list and they didn’t think to protect it with a blanket so needless to say it’s top got scratched up pretty badly.The table has the 4 sections in the middle and putter band around the edge.Your article is very helpful in guiding me on how to fix it thanks.Joy
Hi Joy, somehow I missed your comment when you first posted it. I’m happy to hear this blog was helpful to you! Thanks for stopping by!
How did you apply the polycrylic and sand in between?
Hi Robyn, I did end up writing the post about how I applied the polyurethane and you can read that here: https://rawhydefurnishings.com/7-tips-applying-polyurethane/. But I believe what you want to know is probably this – did I apply the polyurethane in each section as I did with the stain and the sanding? The answer is no. I applied the poly on the entire top of the table all in one direction after the stain was completely dry. And I did a very light sanding in the same manner between coats. Hope this helps!
I am having the same issue, and your table ended up looking beautiful! How do you sand the different sections without accidently getting scratches in other panels? It seems it would be very difficult to sand toward the center of the table. Thanks!
Hi Lori, it’s almost impossible to not overlap a little bit. Just try to keep it inside the edge of the different grain directions as much as possible. I used a palm sander for this so I’m sure I didn’t 100% stay inside the sections. I hope that helps!
Basically, as your article suggests, the general rule of sanding in one direction doesn’t always apply and is dependent on the item you are sanding. That is good to learn as I have no skills in carpentry and learning these kinds of things always helps out. I’ll possibly have ours professionally done so that I wouldn’t mess it up too. Thanks!
Howdy! Quick question though, I’m curious your thoughts on Makita vs Harbor Freight. Which makes better sanders? I’m just getting into building furnature for fun. I’m not sure what brand of tools to buy. Thanks for the post, and I look forward to seeing your reply. 🙂
Hi Klara, I’ve not used any sanders from Harbor Freight. I have used Makita though and have been happy with both the sanders I have from them. My dream sander would be either a Surf Prep sander or Festool with a dust collection system. Those are much pricier options though so it may not be something you want to splurge on if you’re just getting started. Makita I feel is a good price range for a beginner but still a quality tool.
Great article! I have a quick question. I’m curious what your opinion is on belt sanders. Do you have a favorite for sanding decks? My current belt sander just broke on me right in the middle of refinishing my dad’s deck. Much appreciated. :]
Hi Trish, I have never used a belt sander so I can’t offer an opinion for you unfortunately. Hope your project ended well!